Other
Rye Sourdough Starter Step by Step
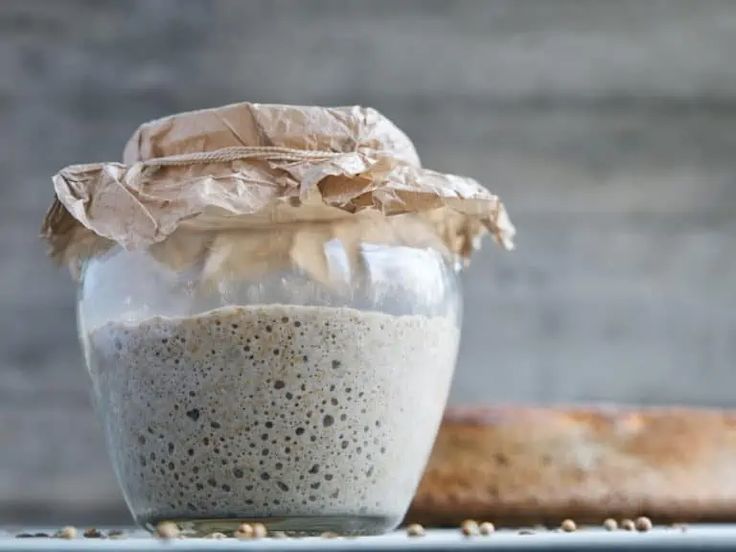
A homemade rye sourdough starter recipe step by step. Homemade rye sourdough starter is a natural fermentation of rye flour and water. Thanks to it, you can bake aromatic sourdough breads without yeast. At the beginning, it needs a few days of patience, but later you only need to feed it regularly and store it in the fridge.
Method
1
INTRO
2
A homemade rye sourdough starter recipe step by step. Homemade rye sourdough starter is a natural fermentation of rye flour and water. Thanks to it, you can bake aromatic sourdough breads without yeast. At the beginning, it needs a few days of patience, but later you only need to feed it regularly and store it in the fridge.
3
* 50 g rye flour, wholemeal type 2000
4
* 50 g lukewarm water
5
* a clean jar, preferably 500–700 ml
6
* a spoon for mixing
7
Add 50 g rye flour, wholemeal type 2000 to a clean jar and pour in 50 g lukewarm water.
8
Mix thoroughly until a thick paste forms. Cover the jar with cheesecloth, a paper towel, or a slightly tightened lid. The starter must have access to air, but it should not be tightly sealed.
9
Set the jar in a warm place for about 24 hours. The best temperature is about 22–26°C.
10
After 24 hours, add to the jar:
11
* 50 g rye flour, wholemeal type 2000
12
* 50 g lukewarm water
13
Mix and set back in a warm place for another 24 hours.
14
* At this stage, the starter may not yet smell pleasantly. It can have a sour smell, slightly fruity, sometimes a bit strange. This is normal.
15
The starter should start working. Small bubbles may appear, a slightly sour smell and a delicate increase in volume.
16
If there is already a lot of starter in the jar, leave about 50 g, and discard the rest or use it for pancakes/crepes. Then feed:
17
* 50 g starter
18
* 50 g rye flour, wholemeal type 2000
19
* 50 g lukewarm water
20
Mix and set aside for 24 hours.
21
Repeat feeding:
22
* 50 g starter
23
* 50 g rye flour, wholemeal type 2000
24
* 50 g lukewarm water
25
Mix and set aside in a warm place.
26
The starter should now be growing more clearly, with bubbles and a sour, bread-like smell.
27
Feed the starter again:
28
* 50 g starter
29
* 50 g rye flour, wholemeal type 2000
30
* 50 g lukewarm water
31
After feeding, observe the starter. If within a few hours it grows, becomes full of bubbles and has a pleasant sour smell, it is ready for baking.
32
A young starter may still be weak, so the first bread may rise longer. With each subsequent feeding, the starter will become stronger.
33
Active starter:
34
* has lots of bubbles,
35
* grows after feeding,
36
* smells sourly, like yogurt, like apple or like bread,
37
* has a thick, slightly aerated structure.
38
It’s best to use the starter when it is after feeding and has reached its highest level of growth. Usually this happens after 4–8 hours, depending on the temperature in the home and the strength of the starter.
39
If the starter is in the fridge, take it out the day before baking or in the morning on the day of baking.
40
The simplest feeding:
41
* 50 g starter
42
* 50 g rye flour
43
* 50 g lukewarm water
44
Mix and leave at room temperature for 4–8 hours.
45
When the starter grows, it will bubble and smell pleasantly sour; you can use it for bread dough.
46
If the starter has been in the fridge for a long time, it’s worth feeding it twice before baking. First time after taking it out of the fridge, second time after a few hours or the next day.
47
If you don’t bake every day, it’s best to keep the starter in the fridge.
48
After feeding, wait 1–2 hours until the starter slightly starts to move, and then put the jar in the fridge. The jar can be screwed on, but not very tightly.
49
In the fridge, the starter slows down and it doesn’t need feeding every day.
50
If you don’t bake, feed it about once every 7–10 days.
51
Maintenance feeding:
52
* 30 g starter
53
* 30 g rye flour
54
* 30 g water
55
or a larger portion:
56
* 50 g starter
57
* 50 g rye flour
58
* 50 g water
59
After feeding, leave the starter on the counter for 1–2 hours, then put it into the fridge.
60
Sometimes liquid appears on the starter. It can be transparent, gray, or slightly brown. This is a sign that the starter is hungry.
61
If the smell is sour but not moldy, it’s enough to mix the liquid in or pour it off and feed the starter with fresh flour and water.
62
You must discard the starter if:
63
* A sour smell is normal. Mold and strange colors are not normal.
64
Day 1:
65
50 g rye flour + 50 g water
66
Day 2:
67
add 50 g flour + 50 g water
68
Day 3:
69
leave 50 g starter, add 50 g flour + 50 g water
70
Day 4:
71
leave 50 g starter, add 50 g flour + 50 g water
72
Day 5:
73
leave 50 g starter, add 50 g flour + 50 g water
74
After 5–7 days, the starter should be ready for baking.
Tips
💡 It’s best to use whole rye flour, because sourdough starter starts easiest with it. The water should be lukewarm, but not hot.
Warnings
⚠️ mold appeared,
⚠️ pink, orange, green or black discolorations,
⚠️ it smells very unpleasant, rotting or chemical.
⚠️ The most important tips
⚠️ - Use a clean jar and a clean spoon.
⚠️ -Do not tightly seal the freshly set starter.
⚠️ - Do not use hot water, because it can weaken the starter.
⚠️ - The warmer it is in the kitchen, the faster the starter works.
⚠️ - A young starter may need more time, so the first breads may rise more slowly.
⚠️ - The best starter is one that is fed regularly and used.